

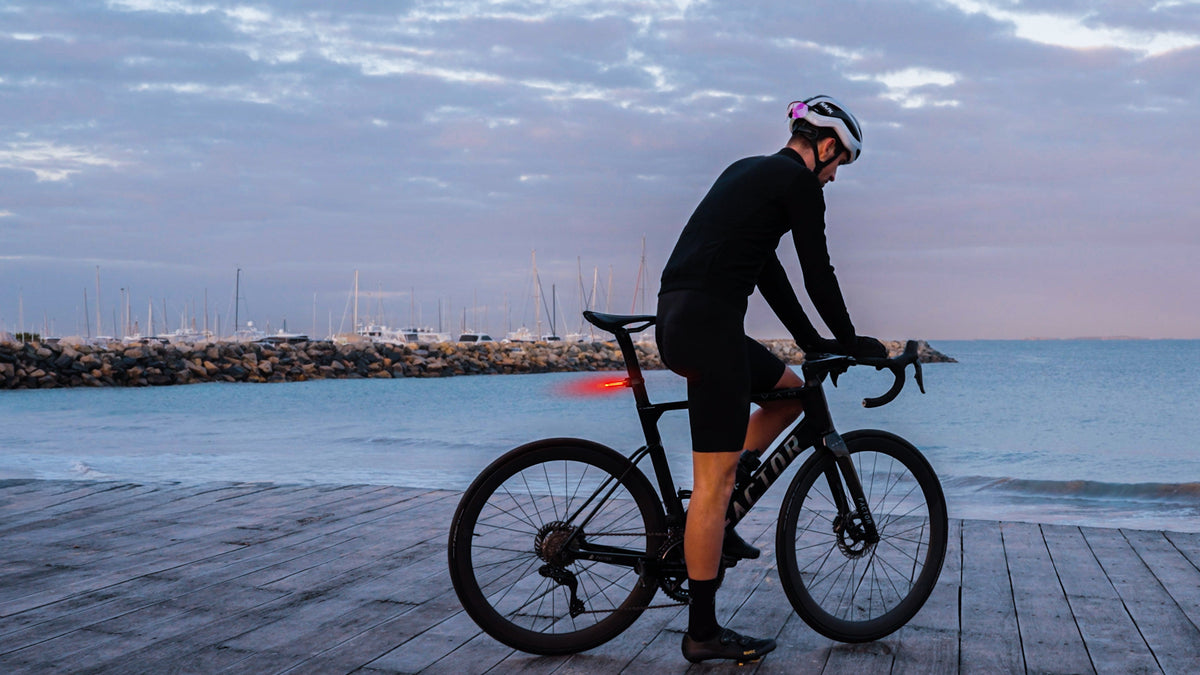
A rear light needs to remain visible from behind without interfering with the bike or its cargo. When a bike has a rear rack, panniers, bags, or other accessories, the standard seatpost position may not always provide the clearest setup. In these cases, bike rack lights can offer a practical way to position a rear light farther back on the bike.
However, mounting a light to a rear rack is not simply a matter of attaching it to the nearest tube. The mounting holes, bracket, height, angle, cargo clearance, and exposure to vibration and water can all affect how well the light works.
Read our guide on what to consider when mounting a rear bike light to a rear rack and how to check the installation before riding.

When Are Bike Rack Lights Useful?
A rear rack can be useful when the seatpost or saddle area is already occupied by other equipment. Riders carrying panniers, rear bags, or commuting gear may also find that a rack-mounted position provides more space for the rear light.
The main purpose is to keep the light visible from behind. A rack-mounted light can be especially practical when cargo sits around the seatpost area or when a bag could partially cover a conventional tail light.
For everyday commuting, touring, and utility cycling, the important question is not simply whether the light can be attached to the rack. It is whether the final position gives following road users a clear view of the light.
Precautions for Installing Bike Rack Lights
Before mounting bike rack lights, take a moment to check the rack structure and the surrounding space. A suitable mounting position should provide a secure connection while keeping the light clear of bags, cables, and moving parts.
It is also important to consider how the light will perform once the bike is fully loaded. The following points can help you choose a stable mounting position and maintain good rear visibility during everyday riding.
Check the Mounting Holes, Bracket, and Adapter
Before installing bike rack lights, inspect the rack to determine how the light can be secured.
Some rear racks have dedicated mounting holes or tabs near the back. Others may require a compatible bracket or adapter. The mounting system should hold the light firmly without preventing you from tightening the rack hardware properly.
Check these points before installation:
-
Mounting holes: Confirm that the rack has a suitable attachment point.
-
Bracket compatibility: Make sure the light bracket can connect securely to the rack.
-
Adapter requirements: If the mounting position and light bracket do not match directly, use the appropriate adapter.
-
Clearance: Make sure the mounting hardware does not interfere with panniers, bags, or other rack accessories.
-
Stability: The light should remain fixed when the bike is moved or ridden over uneven surfaces.
Avoid forcing a bracket into a position it was not designed for. A secure connection is more important than simply finding a way to attach the light.
Choose the Right Height and Angle
Once the mounting point has been identified, consider the light's height and angle.
A rear bike light should point toward traffic behind the bicycle rather than toward the ground, the sky, or directly into nearby cargo. The exact position depends on the rack design, but the light should have a clear line of sight from the rear.
If the light is mounted too low, the rack, rear wheel, or road surface may affect its visibility. If it is mounted too high or at an unsuitable angle, part of the light output may be directed away from approaching traffic.
Cargo placement is also important. Panniers and large bags can extend outward or upward and create blind spots around the light. After loading the bike, check the light again rather than assuming that its unloaded position will remain visible.
Keep Cables Away From Moving Parts
For a rechargeable bike tail light, charging is usually straightforward, but the installation area should still be kept clear of moving components.
If your rack-mounted setup uses any external cable or accessory, route it away from the rear wheel, tire, brake components, and rack joints. Leave enough slack for normal movement without allowing the cable to hang loosely.
Avoid routing cables where panniers or straps can catch them. A clean installation reduces the chance of damage during loading, unloading, or riding.
For integrated lights with a built-in battery, there is no need to create a permanent wired connection to the bicycle. This can make the setup simpler for riders who frequently remove their bags or use the bike in different configurations.
Protect the Light From Mud, Water, and Vibration
A rear rack is exposed to road spray, vibration, and impacts from uneven surfaces. These conditions make a secure mounting point particularly important.
Tighten the mounting hardware firmly, but avoid excessive force that could damage the bracket or rack. After installation, hold the light and gently check for unwanted movement. If the light or mounting hardware becomes covered with mud, clean it as needed so that the light output and mounting mechanism are not affected.
Consider a Rail-Mounted Alternative

Not every bicycle needs a rack-mounted light. If your main goal is to keep the rear light compact and close to the saddle, a rail-mounted design can provide another solution.
The CL01 rail-mounted bike tail light is designed to fit standard seat rails and uses an integrated rail-mounted design that sits beneath the saddle. It weighs 22 g and provides a 300° wide-angle beam for visibility from multiple directions. The CL01 also offers up to 45 hours of runtime, automatic brake detection, and automatic on/off functionality. It turns off after two minutes of inactivity and switches on when movement is detected.
For riders who do not need the light mounted on the rear rack itself, this type of rail-mounted design can keep the lighting position compact while leaving the rack available for cargo.
Check Visibility After Installation
Installation is not complete until you check the light from behind the bike.
Stand several meters behind the bicycle and look at the light from different angles. If possible, check it from approximately the height and position of a following cyclist or driver.
Then repeat the check with your normal cargo loaded.
Look for these potential problems:
-
A pannier or bag partially covers the light.
-
The rack structure blocks part of the light.
-
The light points too far upward or downward.
-
The light moves when the rack is shaken.
-
Straps, cables, or other accessories are close to the light.
-
The light is difficult to see from the side.
The wide-angle design of some bicycle safety lights can help maintain visibility beyond a narrow straight-behind position. The CL01, for example, uses a 300° wide-angle beam designed to provide visibility from multiple directions.
A Simple Installation Checklist
Before your next ride, run through this checklist:
-
Mounting point: Is the rack mounting point strong and suitable for the light?
-
Bracket: Is the bracket or adapter securely attached?
-
Height: Is the light positioned where it can be seen clearly?
-
Angle: Is the light directed toward following traffic?
-
Cargo: Does anything cover the light when the rack is loaded?
-
Cables: Are any cables or straps safely away from moving parts?
-
Stability: Does the light stay firmly in place when the bike vibrates?
-
Visibility: Can you see the light clearly from behind and from different angles?
A few minutes of checking can prevent a small mounting issue from becoming a visibility problem on the road.
Find the Right Rear Light Setup
The best position for a rear light depends on how your bicycle is equipped and how you use it. A rear rack can provide a convenient mounting point when cargo or accessories make the seatpost area difficult to use. For other setups, a saddle-rail or seatpost-mounted light may offer a cleaner solution.
Explore the full range of bike tail lights to find a setup that fits your bike, mounting preferences, and everyday riding needs.

Leave a comment
All comments are moderated before being published.
This site is protected by hCaptcha and the hCaptcha Privacy Policy and Terms of Service apply.